
Set up your roaster, hardware connection and team in Factory
The schedule needs a machine and an operator, and the live curve needs a probe. Three panes in Preferences cover these: Machines, Team and Hardware.
8 min read Updated 19 October 2026
Every roast in Factory is logged against a machine and an operator, and the schedule sizes batches around each machine's capacity. Before your first plan, open Preferences (the cog at the top right) and fill in two short lists: the roasters you own and the people who run them. Probe connections have a third, optional pane. You can plan and log weights without them, but the live curve needs them.
Add your machines
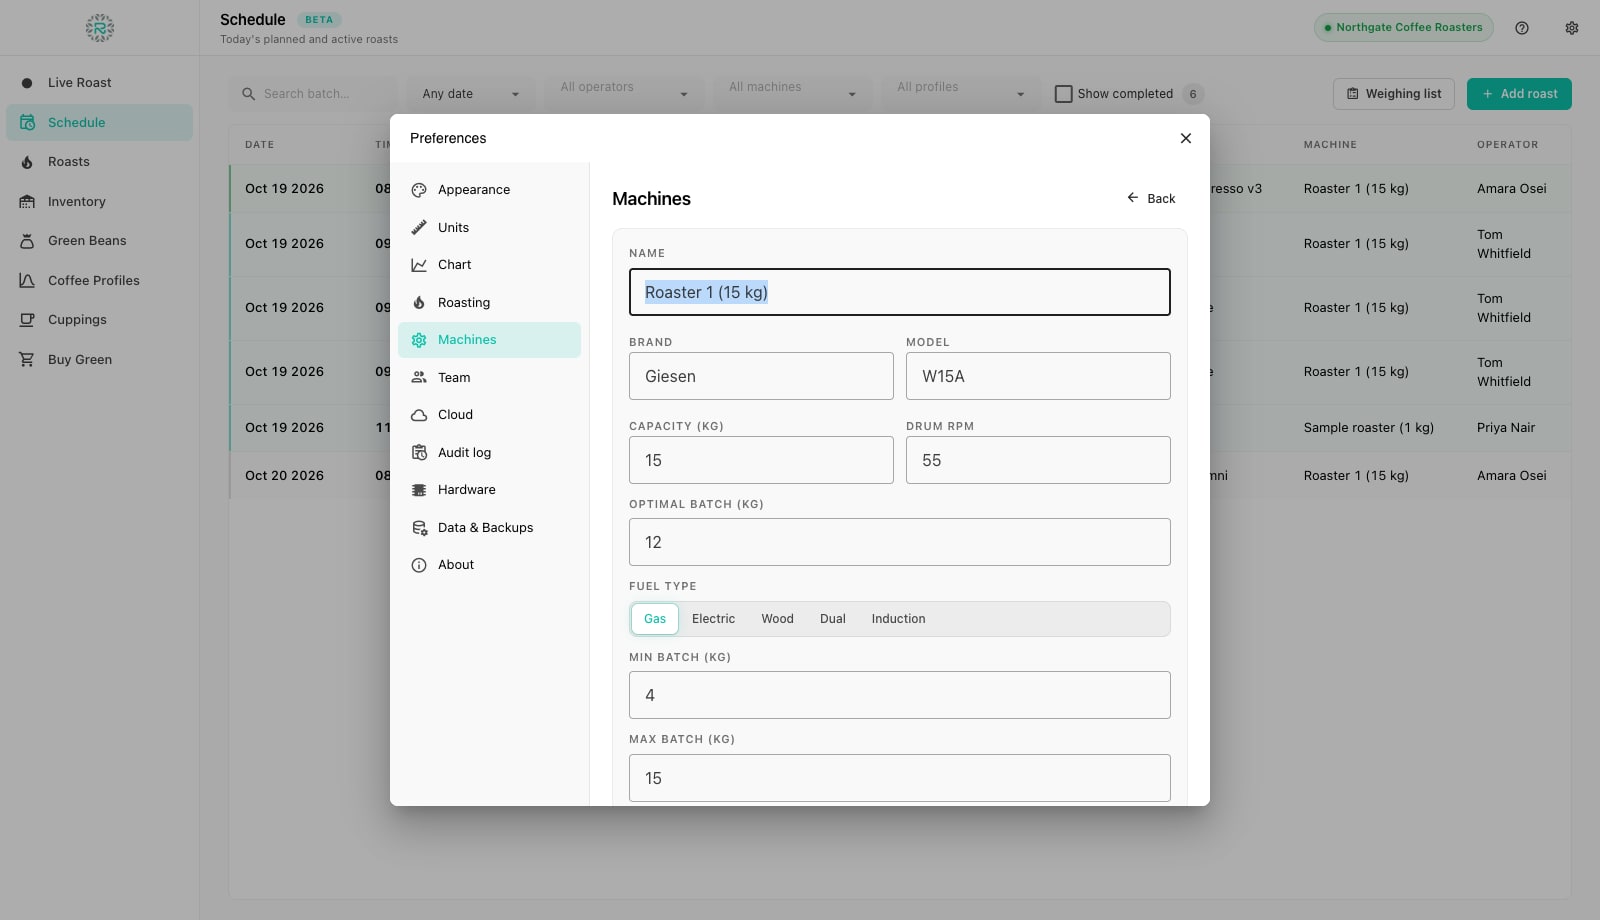
- Open Preferences and choose Machines in the left column, then press Add machine.
- Give it a Name you say out loud in the roastery, such as Roaster 1 (15 kg), and fill in Brand and Model.
- Enter the Capacity (kg), the manufacturer's rated maximum, and the Optimal batch (kg), the charge you actually roast well at. A 15 kg drum that sings at 12 kg should say 12 here: this is the number the schedule checks batches against.
- Set Min batch (kg) and Max batch (kg). The Schedule warns when a planned charge is below the minimum (small charges in a big drum can scorch) or over the optimal batch.
- Pick the Fuel type (Gas, Electric, Wood, Dual or Induction), enter the Drum RPM if you know it, then the planner figures: Roast duration, Warm-up time and Cooldown, in minutes. These drive the start times when you schedule several batches in one go.
- Press Save. Repeat for every physical roaster, including the sample roaster. A machine you retire is archived, not deleted, so its roast history keeps its name.
Add your team
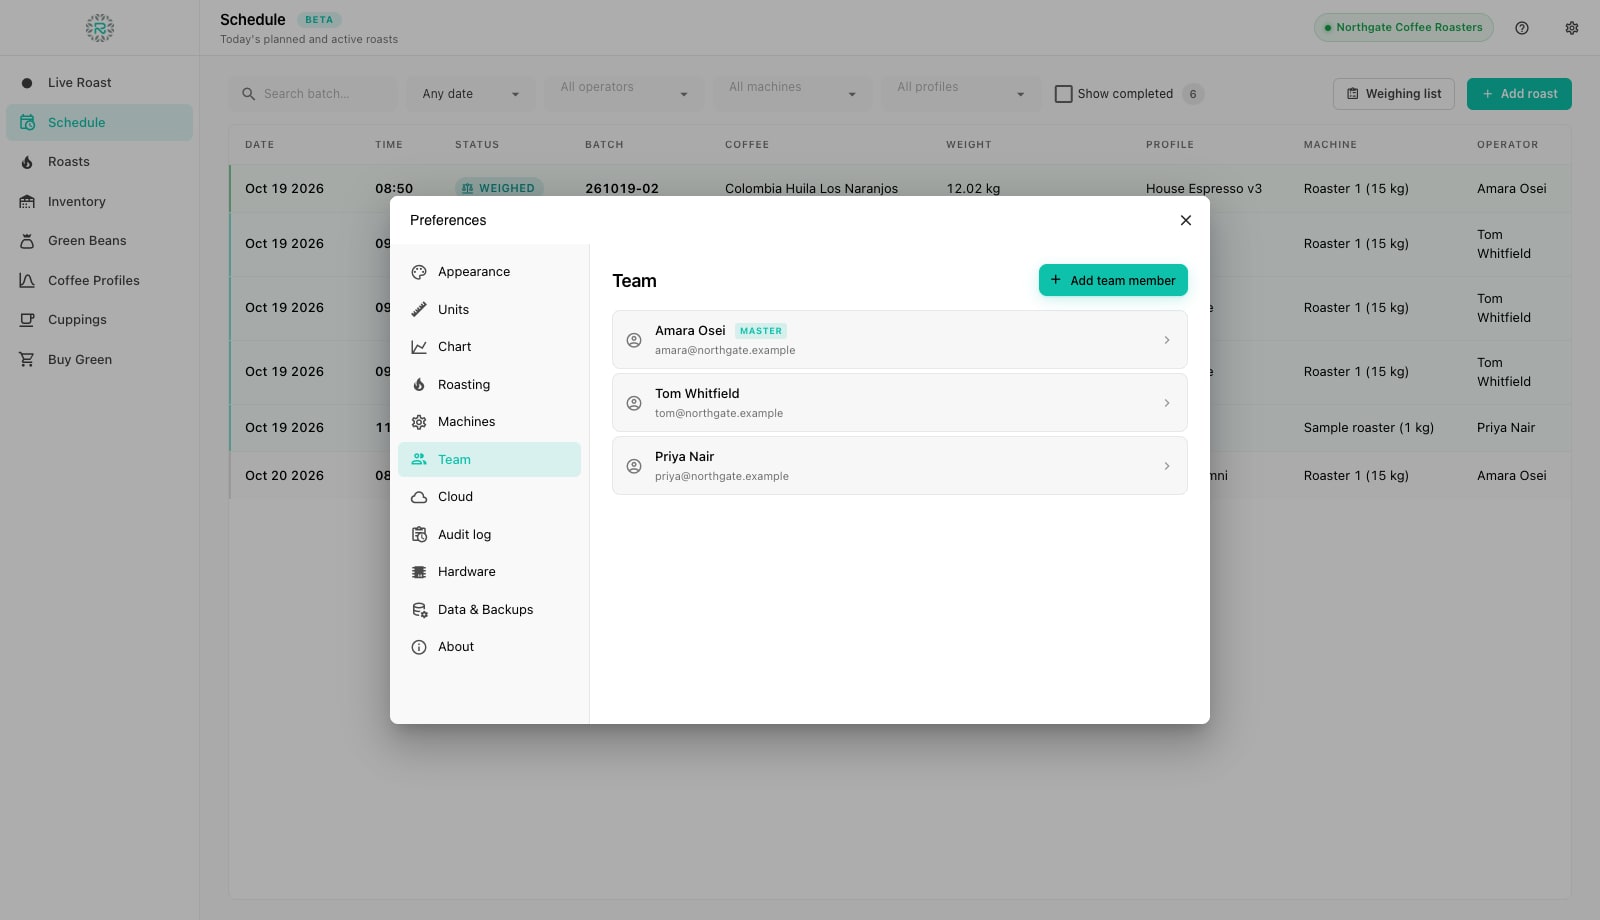
Open Team and press Add team member. Enter the person's Name, Email and Role (Admin or Operator) and press Save. When Factory is connected to Roastnet, saving sends an invite email from the cloud. The new member sets their own password and can then sign in. Offline, the row shows Pending sync and the invite goes out when you reconnect. The operator picker on the Schedule, the cockpit and every job card uses this list, so add everyone who runs the drum. Suspend removes someone from the pickers without changing their roast history.
Connect the probes
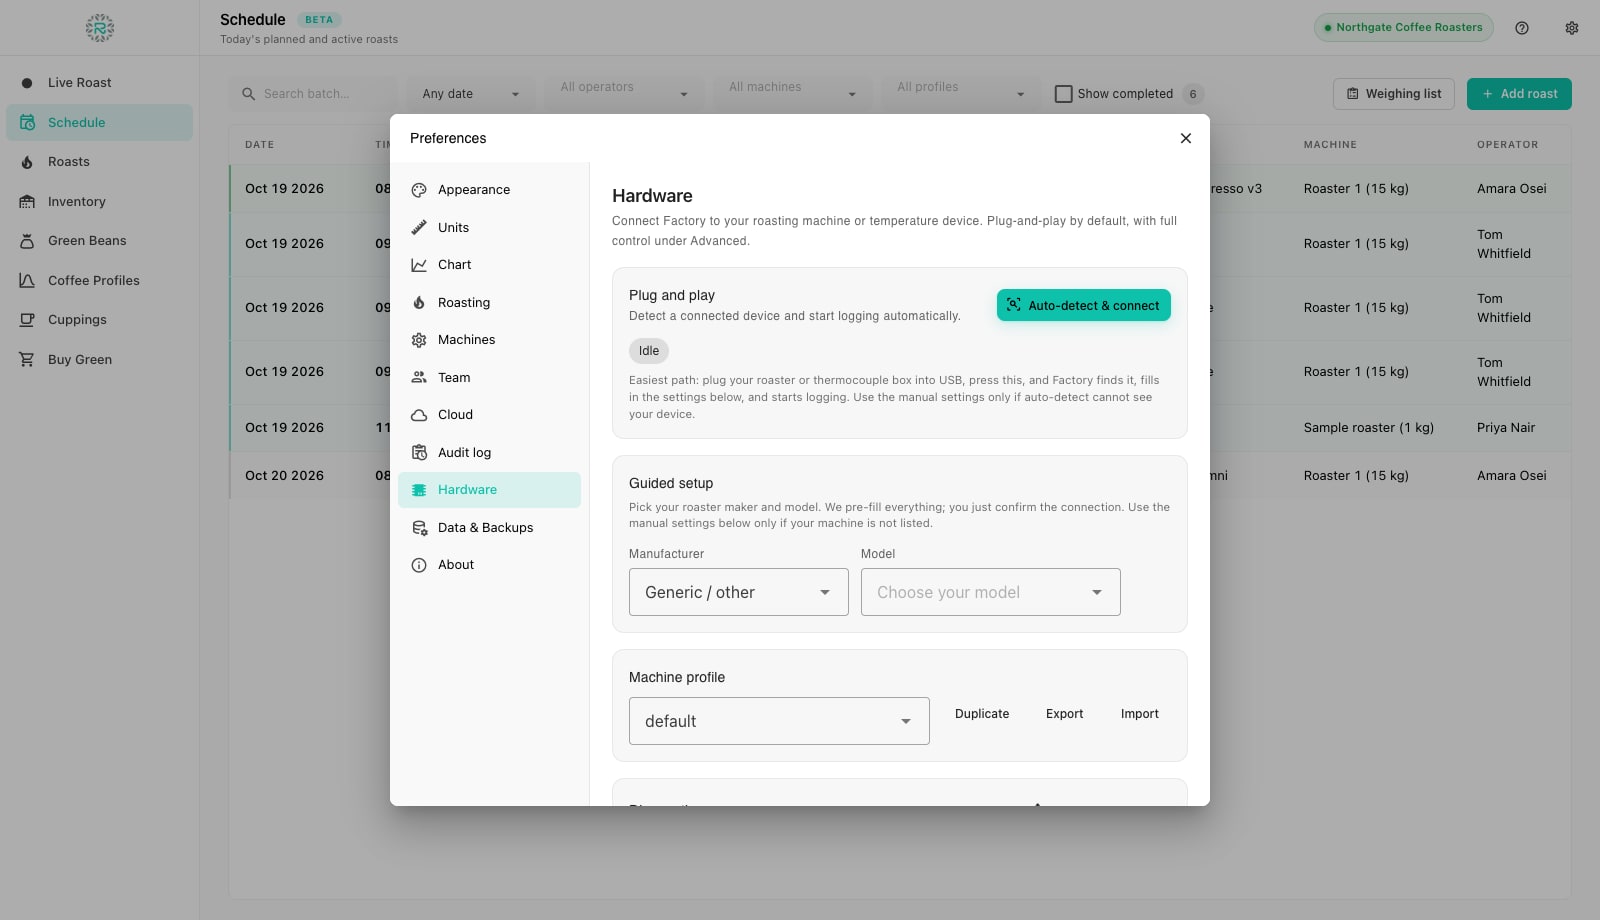
Open Hardware. Common connections need just one button, while less common setups are also supported. Factory supports USB and serial thermocouple boxes and roaster boards, MODBUS RTU and TCP for industrial roasters with a PLC, Phidget interfaces, raw TCP and UDP streams, HTTP polling, WebSocket, MQTT, and Bluetooth LE. The hardware page lists the connections and what each is for.
- Plug the roaster or thermocouple box into USB and press Auto-detect & connect under Plug and play. Factory scans the serial ports, matches what it finds against known device fingerprints, fills in the connection type and port, and starts logging. The status chip moves from Idle to Connecting to Live with the sample rate.
- If auto-detect does not see your machine, use Guided setup: pick the Manufacturer and Model and Factory pre-fills the profile for that family; you confirm the port and press Start feed.
- For anything else, set it by hand under Machine profile: a Device name, the Connection type, the Serial port (press Detect to list them) or the host and port for a network device, then Test connection and Start feed.
- Under Channel mapping & calibration tell Factory which probe is which: the Role of each channel (Bean for the probe in the bean mass, ET for exhaust or environment, Ignore for anything unused) and an Offset or Slope if a probe reads a little high or low.
- Open Advanced only if the machine's manual says so: baud rate and framing for serial (almost every board uses 115200, 8, None, 1), the register map for MODBUS, read interval and timeout. For MODBUS there is a safe Discover registers tool that watches a register window for a few seconds and shows which ones move, so you can assign Bean and Exhaust without reading the manual twice.
- Press Export to save the finished profile as a JSON file. Share it with a colleague who runs the same roaster, or Import one they sent you. Diagnostics (sample rate, dropped samples, reconnects, last packet) live at the bottom of the pane with an Export diagnostics button for support.
Factory remembers the active profile and restarts the feed on launch, so after the first day the setup works when you open the app. A built-in Simulator profile streams a synthetic nine-minute roast. It never starts automatically, but it is the quickest way to walk through the cockpit before the real probes arrive.
Units, chart and roasting defaults
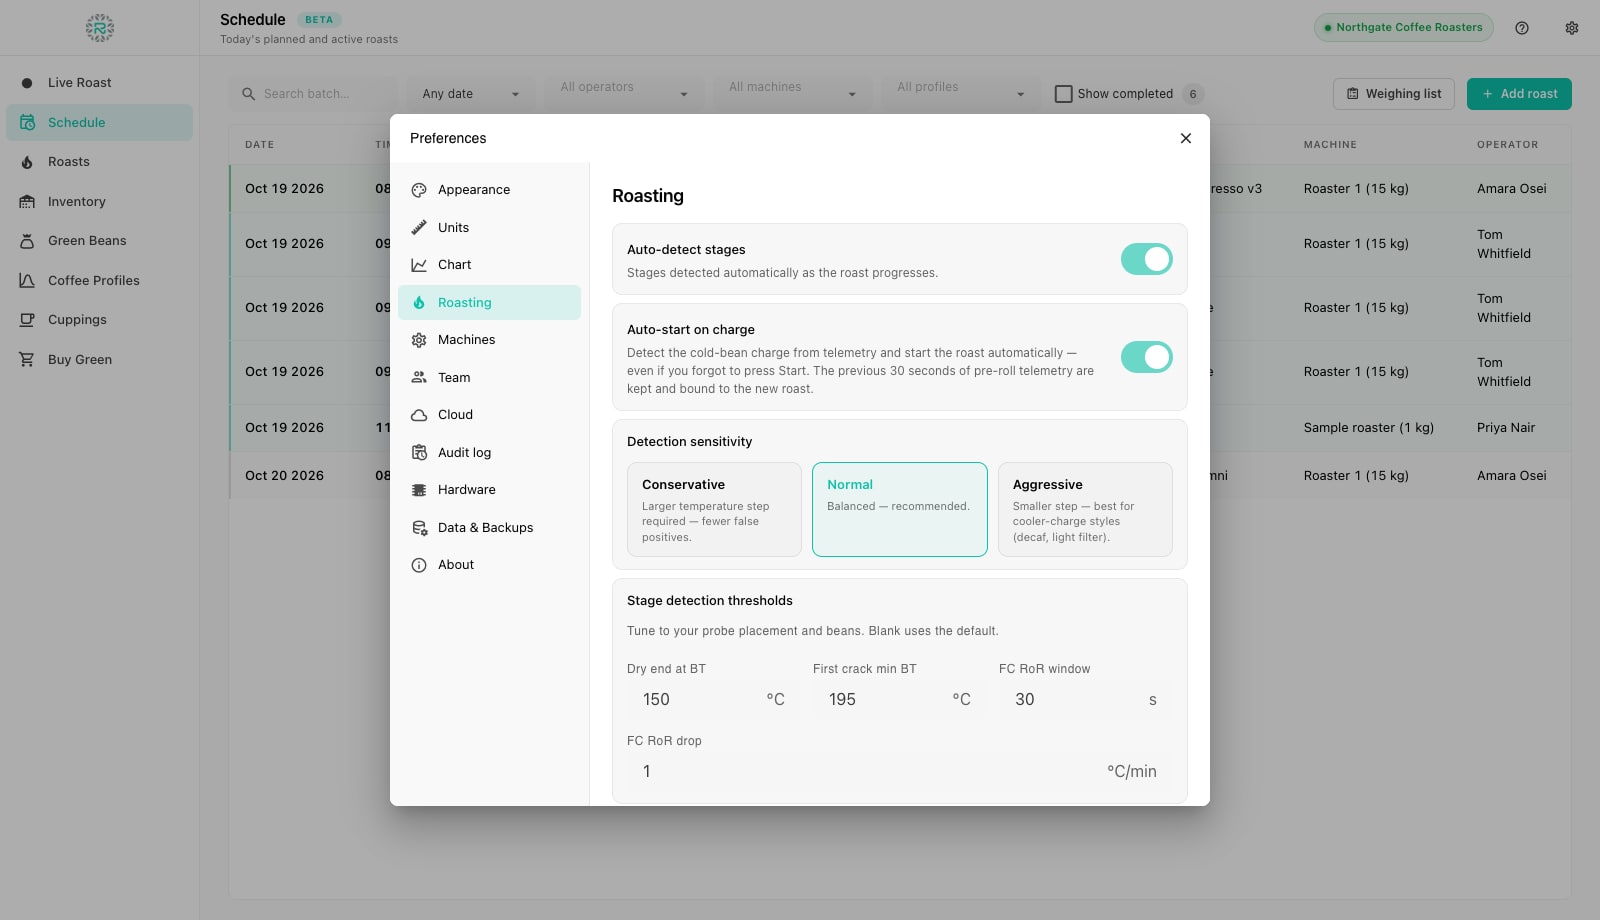
While you are in Preferences, check three more panes. Units sets Celsius or Fahrenheit and kg or lb for the whole app. Chart sets the Rate of Rise smoothing: Responsive, Balanced (the recommended default) or Smooth, with an Advanced delta span for roasters who want an exact window. Roasting holds the automation settings: Auto-detect stages (Factory marks Charge, Dry End, First Crack and Drop from the curve) and Auto-start on charge with a Conservative, Normal or Aggressive sensitivity. It also holds the detection thresholds: dry end at a bean temperature, first crack minimum temperature and the RoR drop that signals it. Tune these thresholds to your probe placement.
Ready to schedule
- One machine per physical roaster, with optimal, minimum and maximum batch set
- Every operator in Team, invited through the cloud if connected
- Probes connected and streaming, channels mapped to Bean and ET
- Hardware profile exported to a file as a backup
- Units, RoR smoothing and stage detection set in Preferences
Where Roastnet helps
Questions roasters ask
- Do I need the probes connected to use Factory?
- No. Scheduling, weighing in, weighing out, job cards, profiles and cuppings all work without a feed. The live curve, rate of rise and automatic stage detection need a connected temperature source.
- Which roasters does Factory support?
- Any machine or probe box that provides temperatures over USB or serial, MODBUS RTU or TCP, Phidget, TCP, UDP, HTTP, WebSocket, MQTT or Bluetooth LE. Support depends on a machine profile, not a software release: write or import a profile to support the roaster.
- What is the difference between capacity and optimal batch?
- Capacity is the manufacturer's rated maximum. Optimal batch is the charge the machine roasts well at, usually a little under capacity. The schedule uses the optimal figure for warnings, not the rated one.
- Can two people share one Factory install?
- Yes. Add both to Team and pick the operator on each scheduled batch or in the cockpit's Operator menu. Every roast and job card records who ran it.
Read next
Add green coffee to Factory: the bean catalogue and receiving stock
Factory keeps two lists that beginners often confuse: Green Beans is the catalogue of coffees you buy; Inventory is the bags you actually hold. Add the coffee first, then receive the bags against it, so every roast deducts from the right lot.
Log a live roast in Factory: the curve, rate of rise, gas, fan, drum and markers
The cockpit is one screen for the whole roast: live curves on the left, numbers and faders on the right, and four stage buttons along the bottom. This is where you log a batch from charge to drop.
Choosing a coffee roaster: batch size, fuel and design
Size the roaster from the volume you expect in year two or three, not from what you sell today, then let fuel, site and support narrow the field. A buyer's framework, not a brand list.
Run the roastery from one place
Green stock, roast plans, wholesale orders and the green coffee market in one platform, with a free roast-logging app for your machine.